Wix Survey – How to add a Survey to your Wix Site
Follow these steps to add a Wix Survey to your site quickly and easily.
2. Copy survey embed code
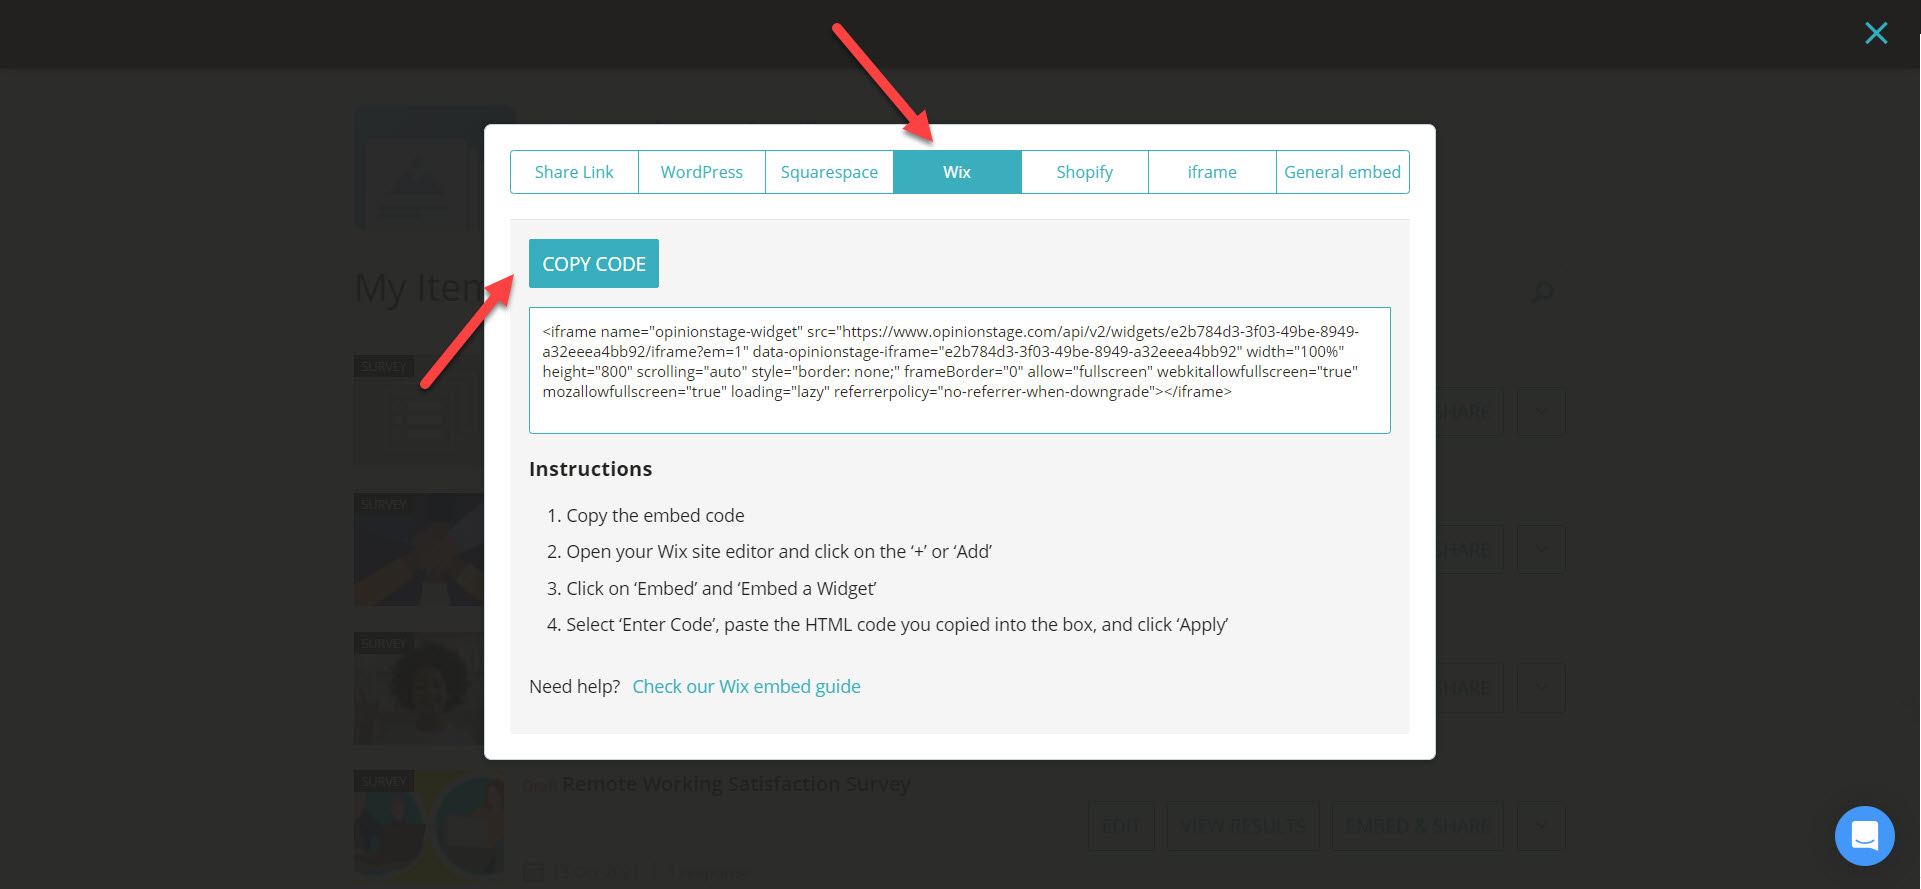
Click the ‘Embed & Share button’, select the ‘Wix’ tab, and copy the code.

3. Go to Wix
Go to your Wix website. Click the ‘+ Add’ button. Under ‘Add to Site’ select ‘Embed’. And under’ Custom Embeds’ select ‘Embed a Widget’.

4. Paste the survey code
Choose the option of ‘HTML Code’. A gray box will appear. Click on it, paste the code you copied earlier into the text box, and click ‘Apply’.

Now you’re done!
Survey Creation Tips
Apply these tips to your survey to take it to the next level.
Think About Your Audience
Start planning the survey with your audience in mind. Figure out what insights you can get from them and how you will get them to participate in your survey.
Keep Your Wix Survey Short
Verify your questions and answers are as short as possible and as clear as possible. Don’t ask too many questions to maximize completion rates. Ask only the essentials.
Make It Visual
Images catch people’s eyes and imagination. Select good-looking images, especially for the Survey cover. You can also add an image to each question and to each answer if you like.
Place It in a Visible Place
Locate your Wix survey in a visible location, such as above the fold, in a section on your site, or in an enter/exit popup.
Use Skip/Branch Logic
Skip/branch logic allows you to jump between questions based on the user’s answer. This makes your survey more personalized to the user that participates in it, asking each user only the relevant questions.
For more information, refer to the survey maker page. You can also create a classic Wix form where all fields appear on one screen or a playful Wix quiz that lets you offer a fun experience while getting to know your target audience.
Create a Free Wix Survey in Minutes
Create a Survey