How to Add a Poll to Your Showit Website
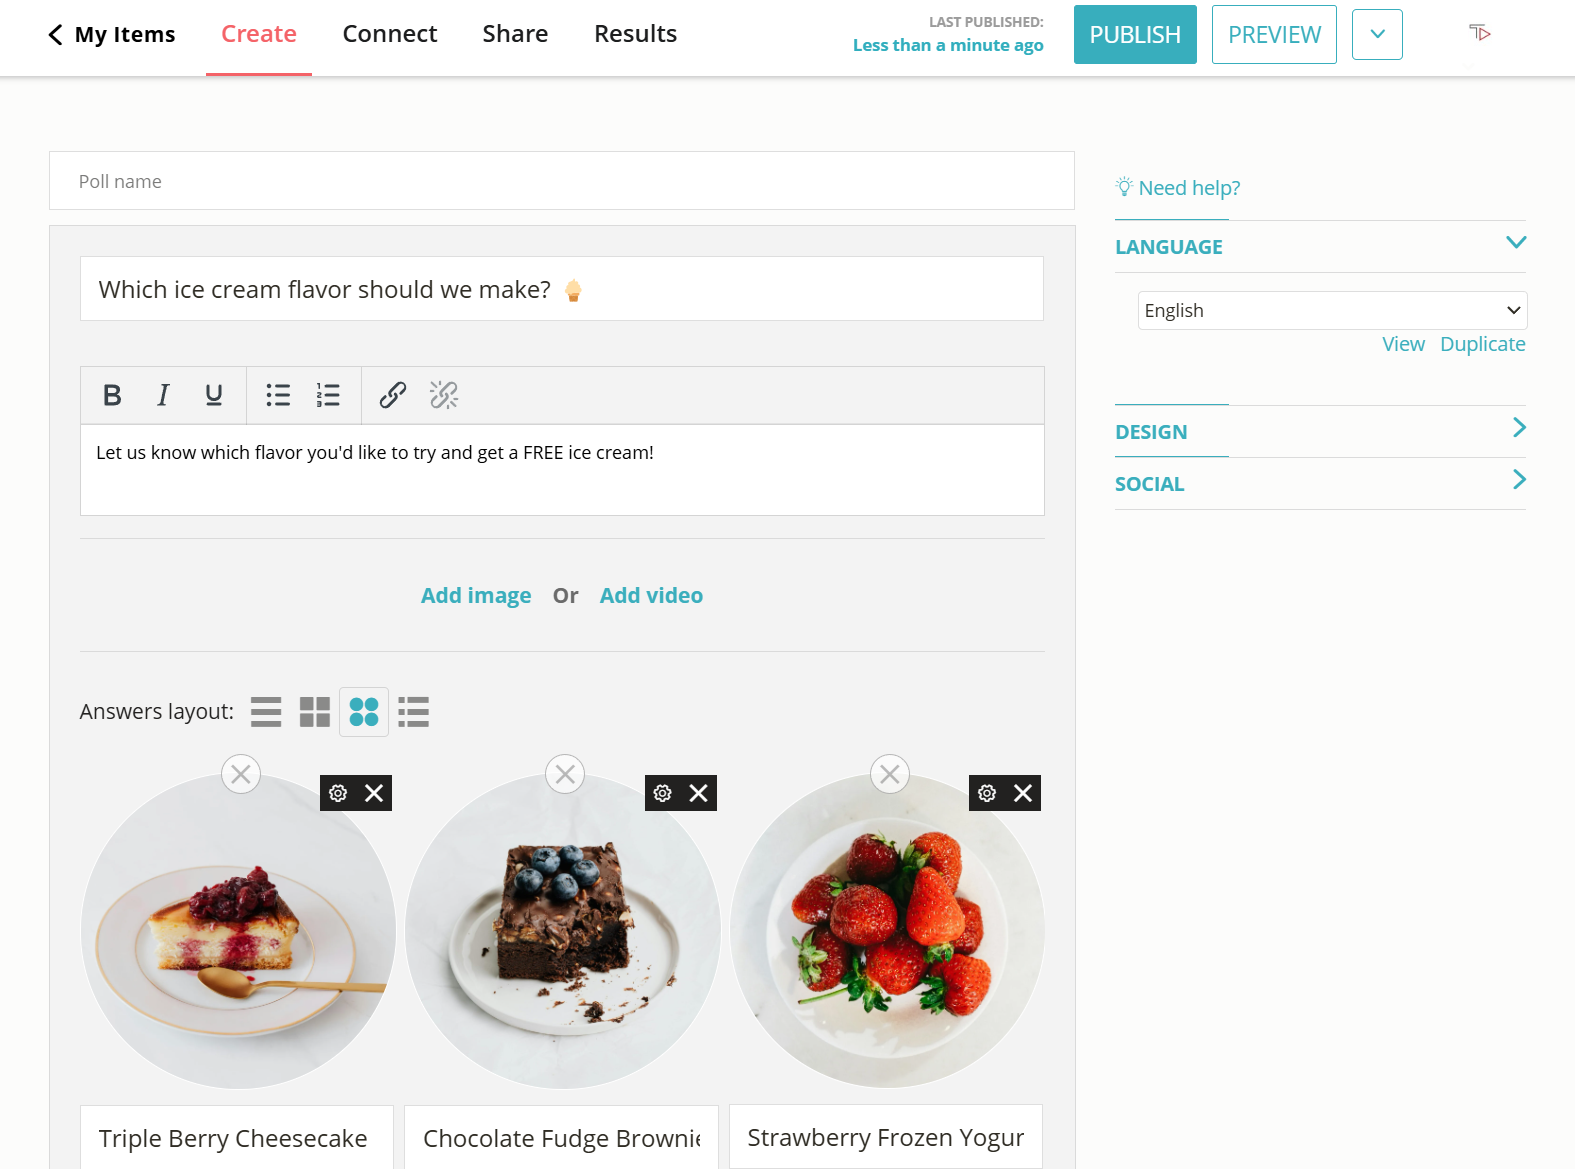
Adding a poll to your Showit site is an easy way to boost engagement, collect opinions, and even guide decisions – whether it’s for customer feedback, product votes, or just for fun. In this guide, we’ll show you how to quickly create a poll and embed it on your Showit website.
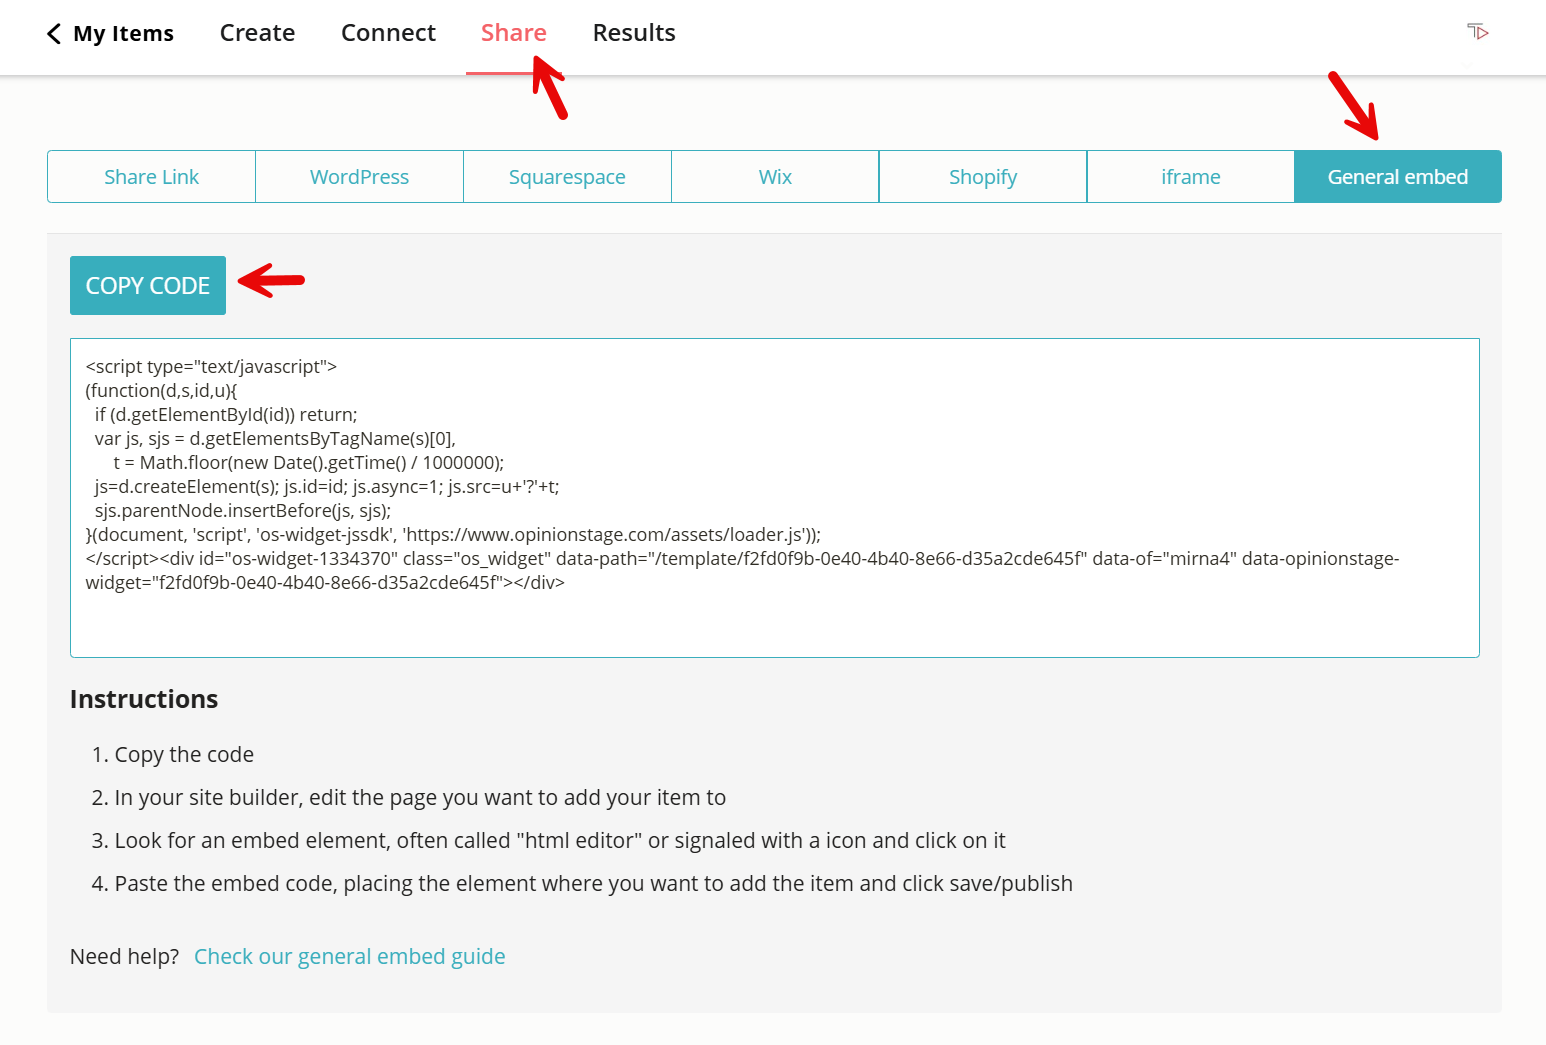
2. Copy the poll embed code
Click the ‘Share’ button at the top of your screen, then go to the ‘General Embed’ tab. From there, copy the poll embed code.
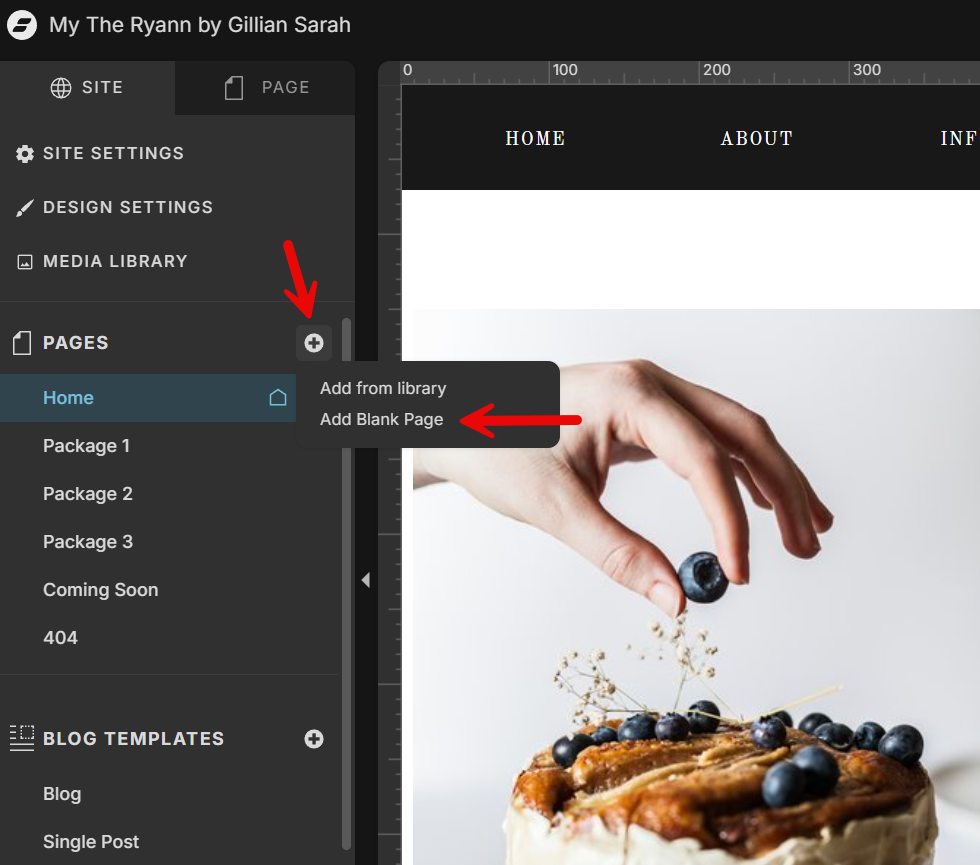
3. Add the poll to Showit
You can embed your poll on an existing page or create a new one. To add it to a new page, click the ‘+’ icon and select ‘Add Blank Page’.
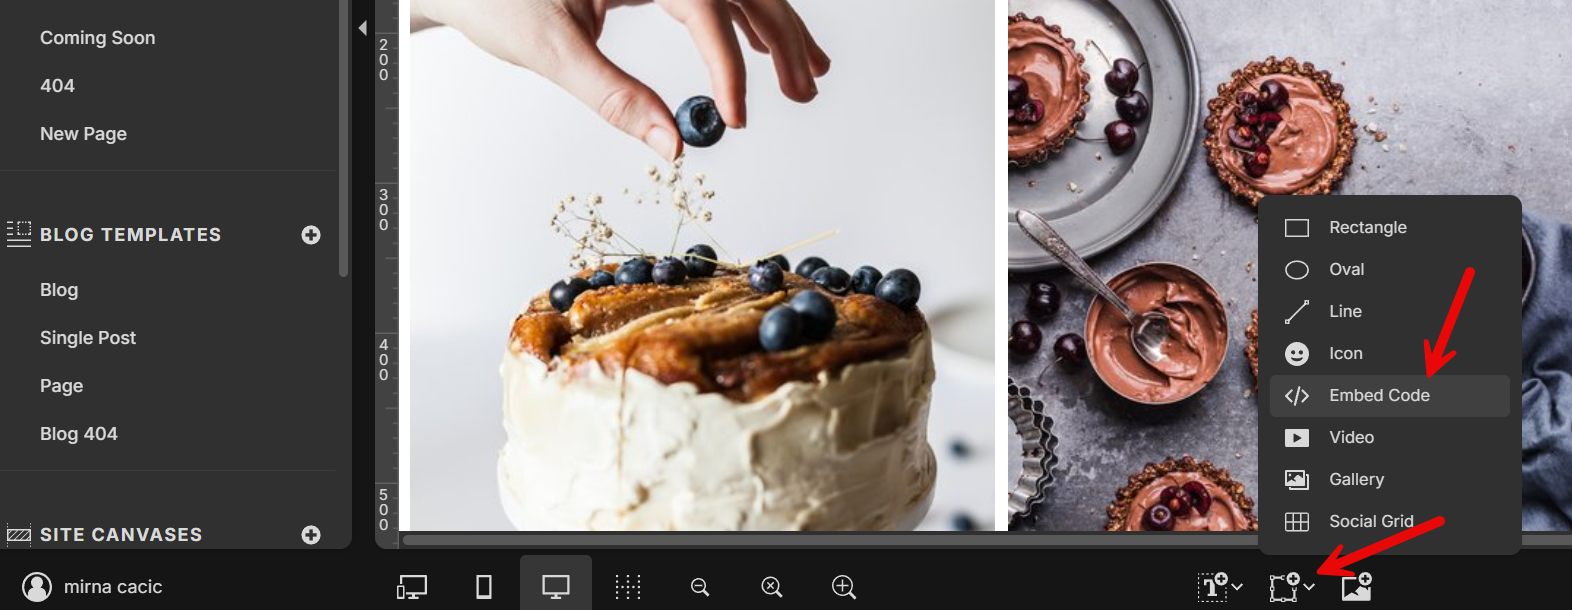
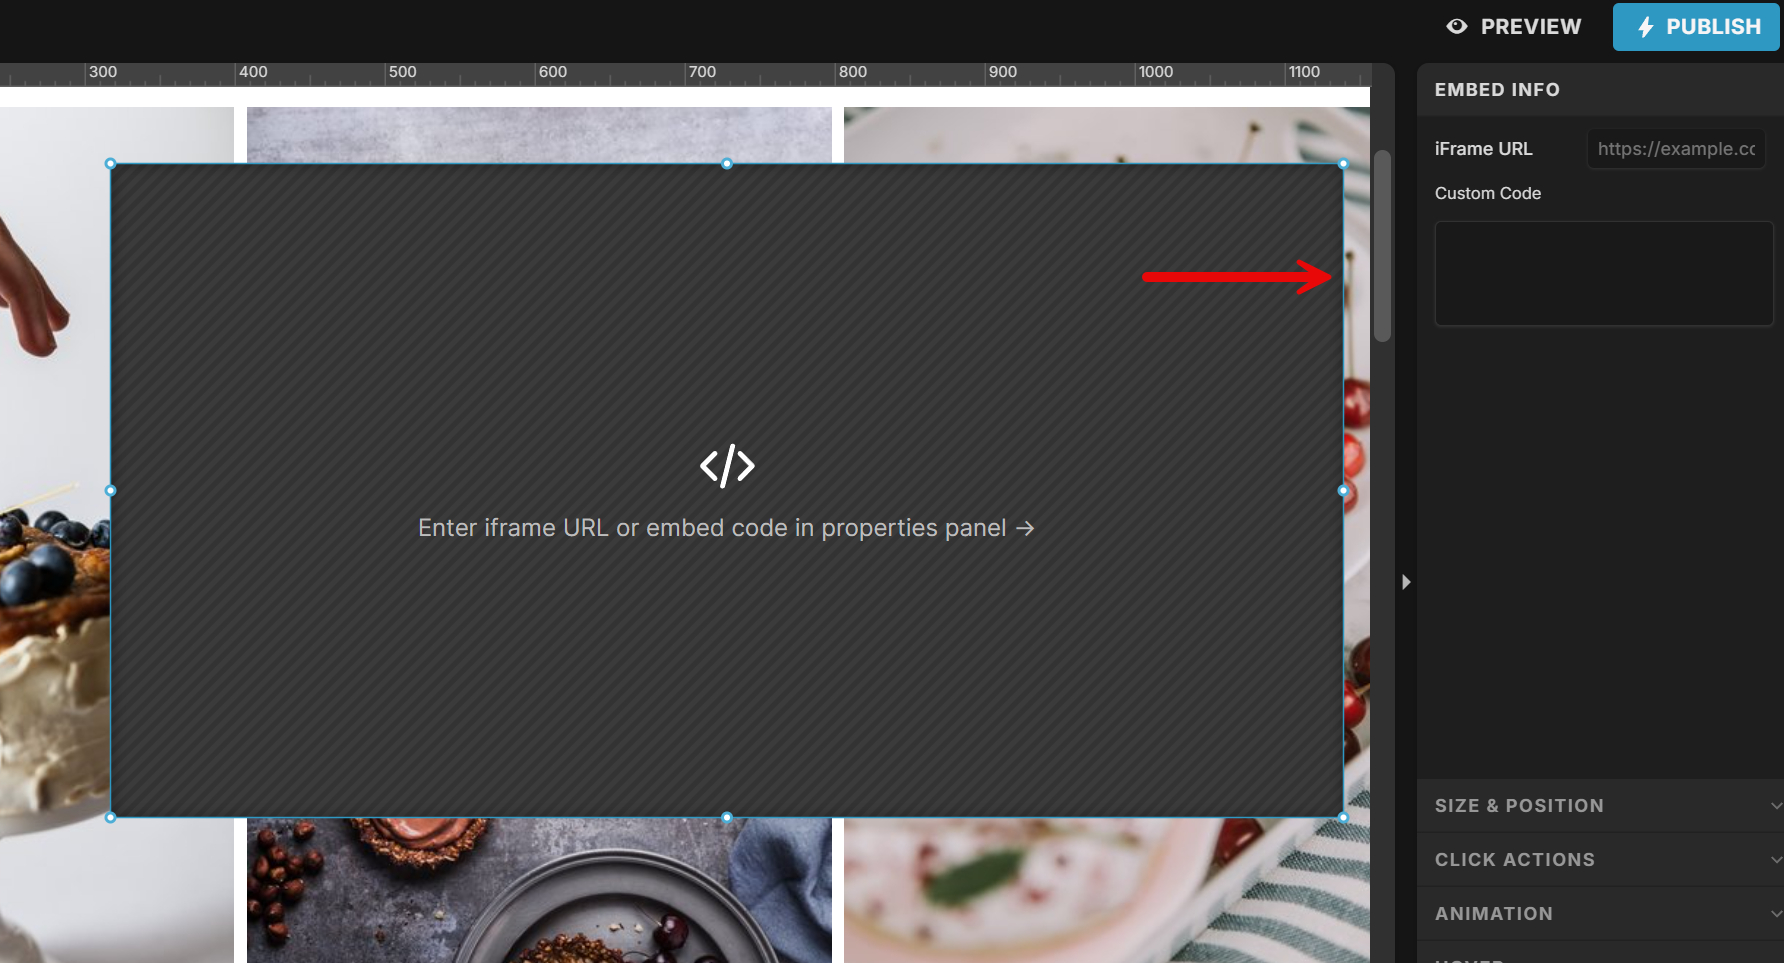
To activate the page editing options, click on your page first, then select the picture frame icon that’s at the bottom of your screen. Then, choose ‘Embed Code.’
When the black box appears, select the ‘Custom Code’ section on the right side.
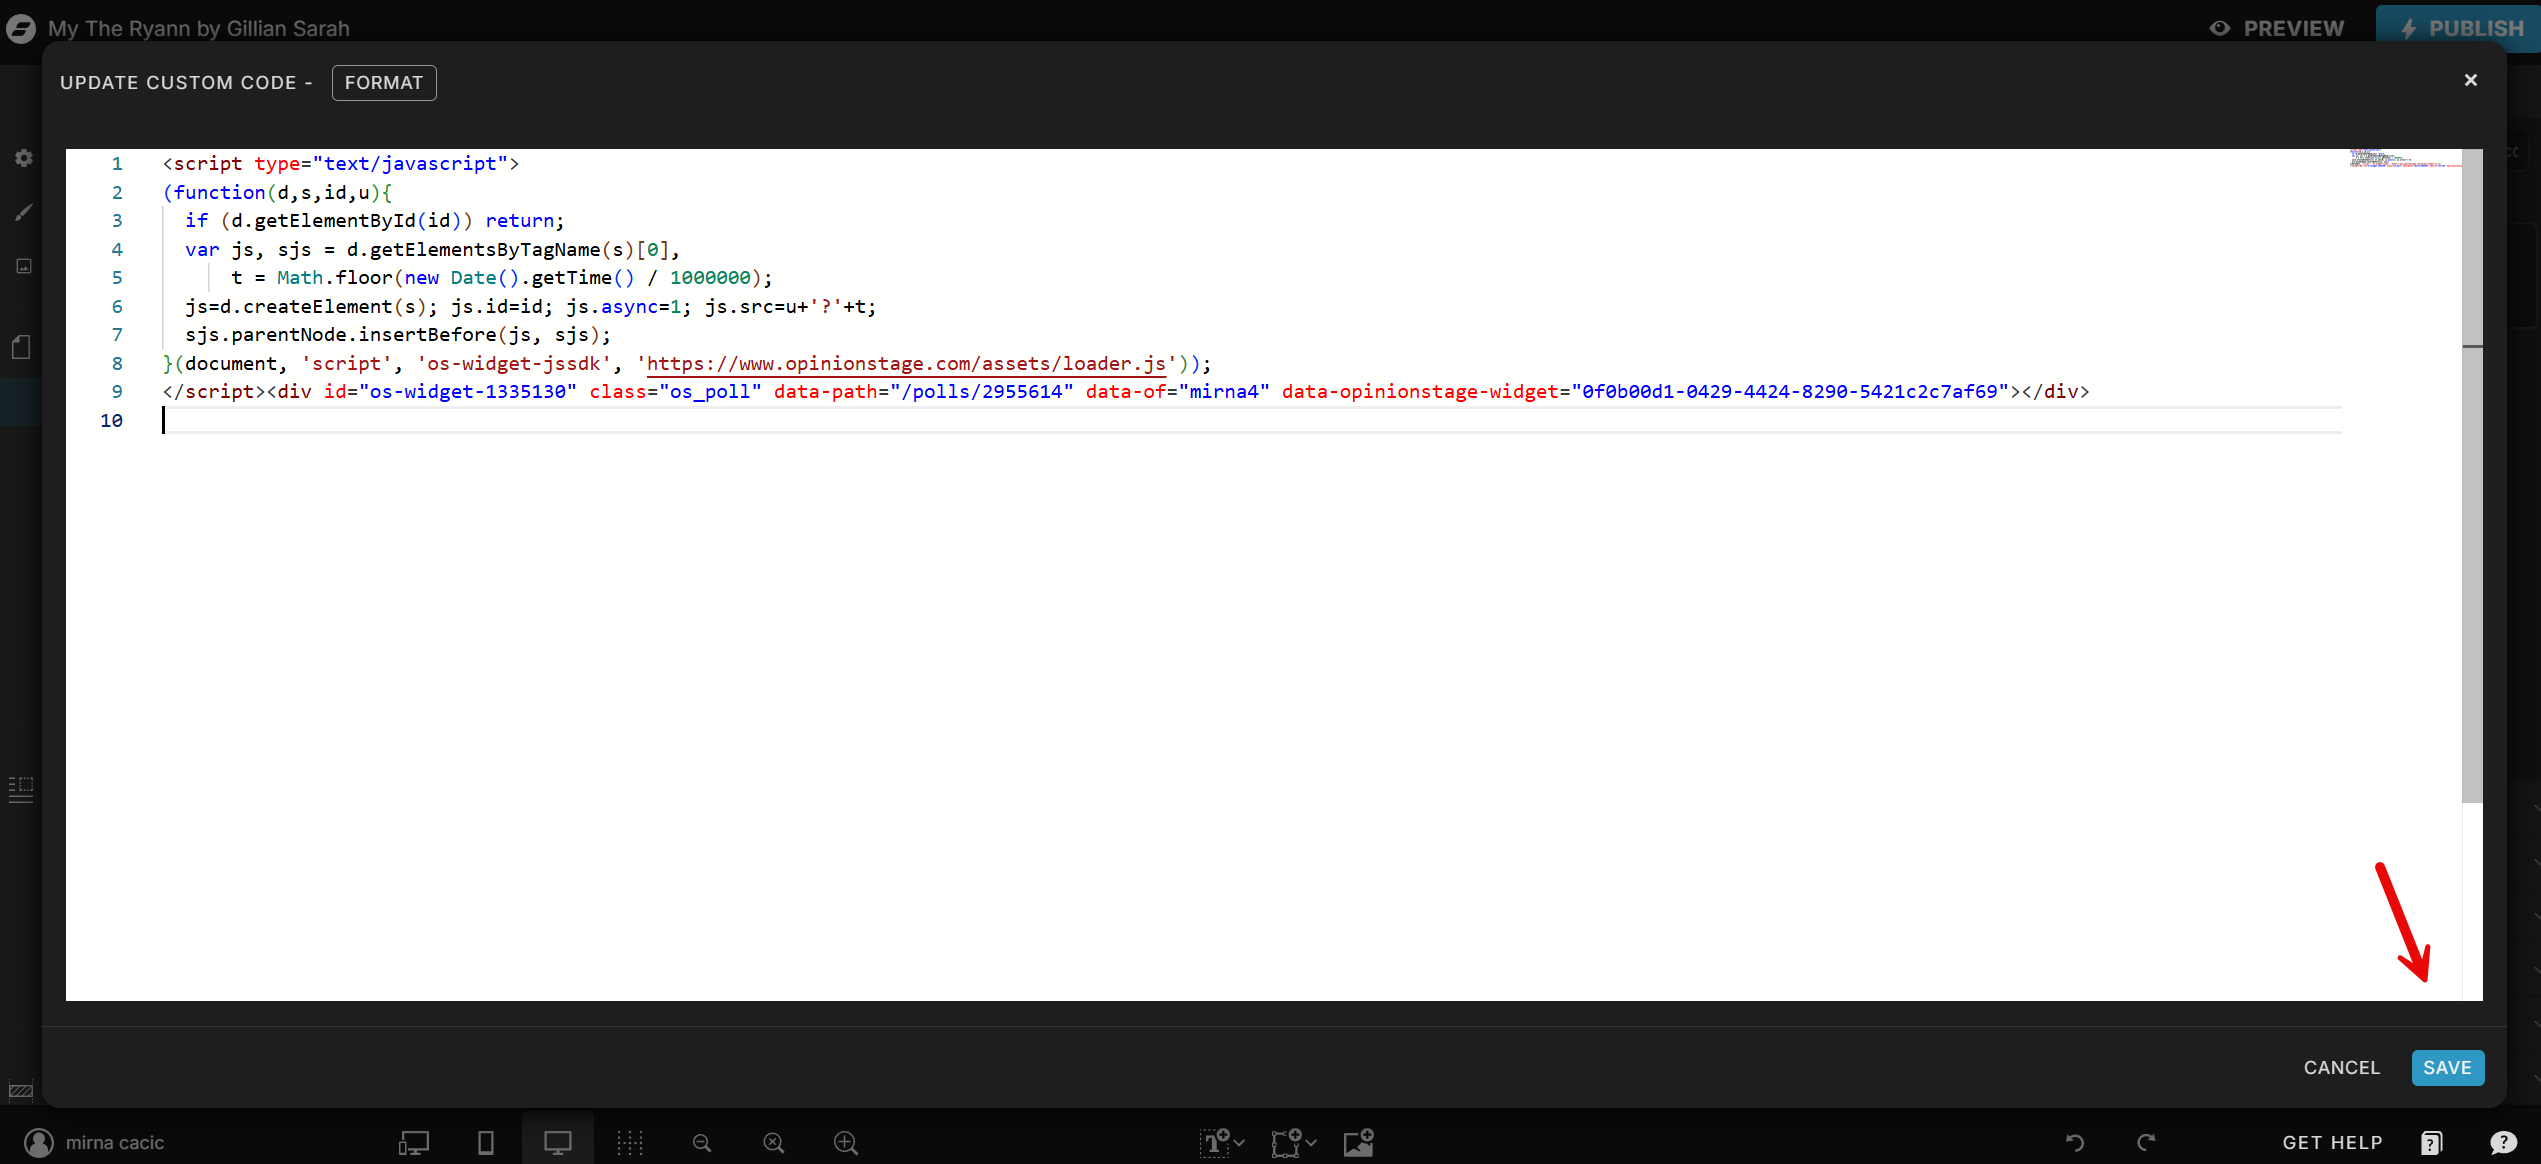
A white box will pop up – paste your embed code here. Next, click ‘Save’ in the bottom right corner.
Your poll should now appear on your site. Adjust its position or resize it as needed, and be sure to click ‘Publish’ to save your changes.
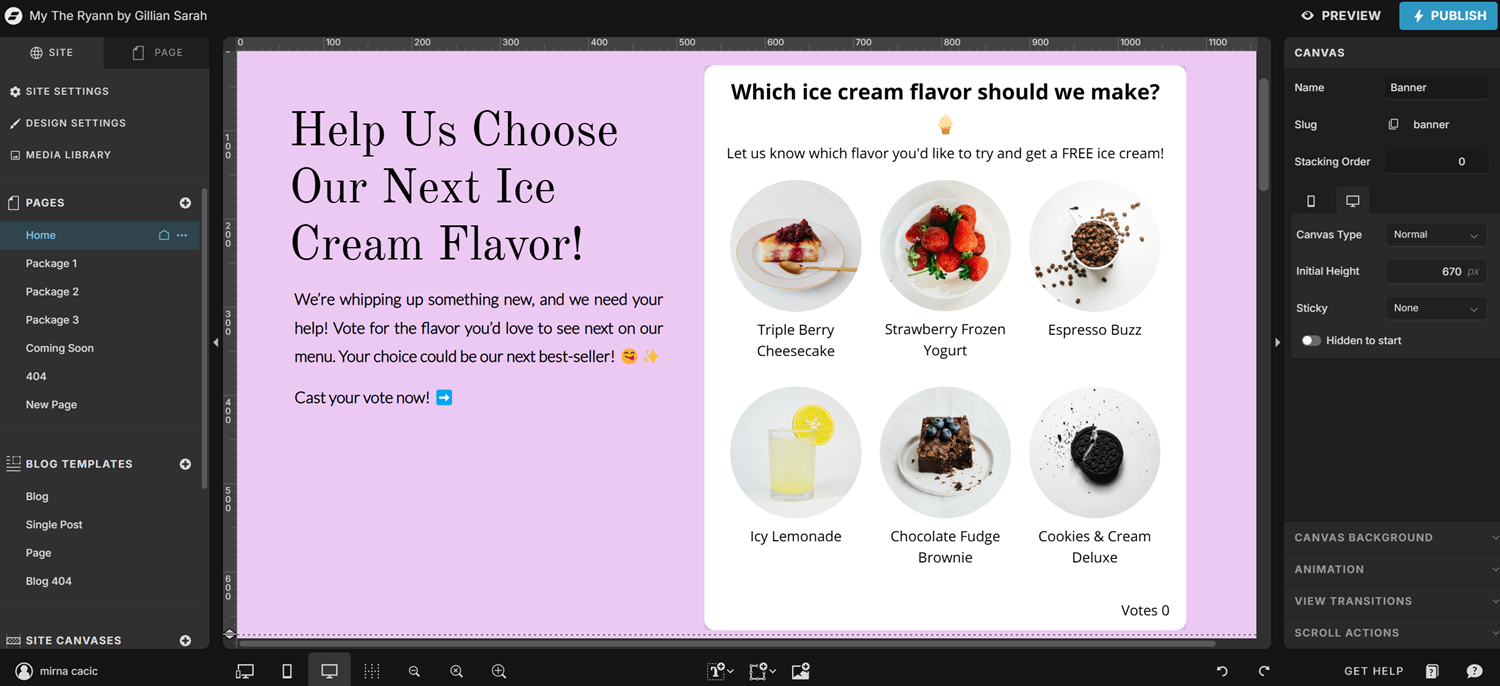
And now you’re done!
Your Showit Poll Is Live – Here’s How to Make It Even More Effective
Now that your poll is up and running, it’s time to get more responses, tweak it as needed, and track performance. A few strategic adjustments can help you reach more people and keep engagement high.
📢 Get More People to Vote
To maximize participation, make sure your poll is easy to find. Try adding and sharing it in these key spots:
- Add it to high-traffic pages and standout areas of your site (like the sidebar, announcement bar, or a featured section)
- Share it in emails, social media, & messaging apps
- Embed it in blog posts or link to it in your bio on social media
🎯 Try This: Add an attention-grabbing message to create anticipation or offer a benefit, making people more likely to participate. Place it in high-traffic areas on your site (like your homepage, sidebar, or announcement bar) or use it as a pinned post on social media. Use a message such as “Pick your favorite now and get a 25% discount on your next order!” or “Vote now, and we’ll reveal the winning choice in our next post – plus a surprise!”
🎨 Fine-Tune Your Poll for Better Engagement
Making small adjustments to the appearance of your poll can have a big impact on engagement and response rates. Consider making these updates:
- Updating the wording to make questions clearer or more engaging
- Adding videos or GIFs to make it more eye-catching
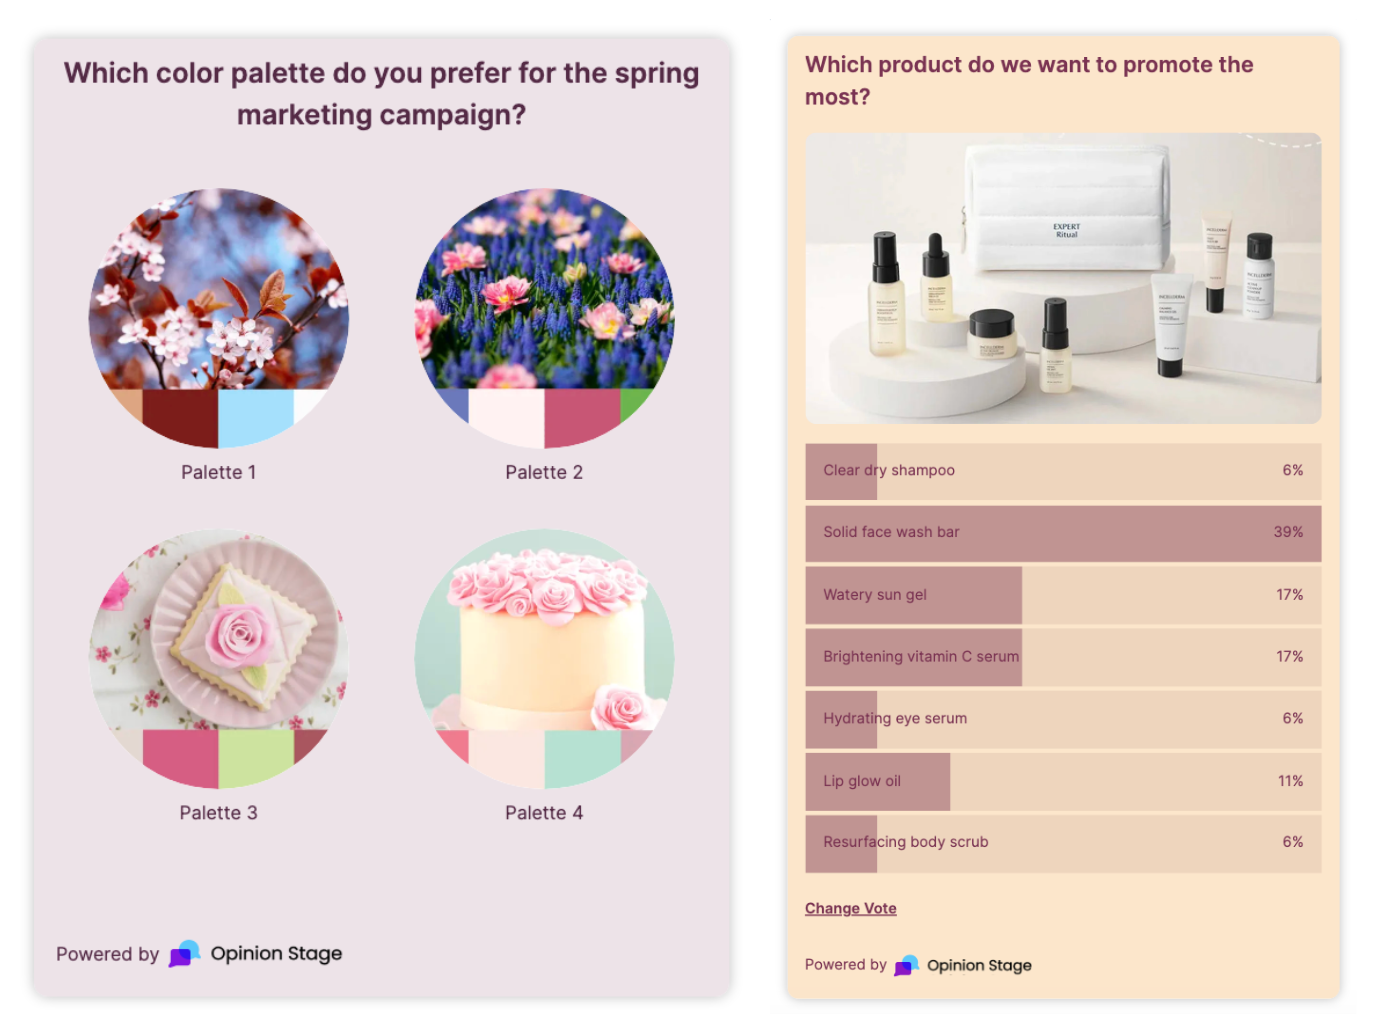
- Testing different poll formats (video, image-based, multiple-choice, thumbnail, etc.)
🎯 Try This: Choose a poll format that grabs attention and makes voting more intuitive. If your poll is about visual options, an image-based poll works best, while a video poll can add an extra layer of engagement for storytelling or product showcases. The right format can make all the difference in how many people participate.
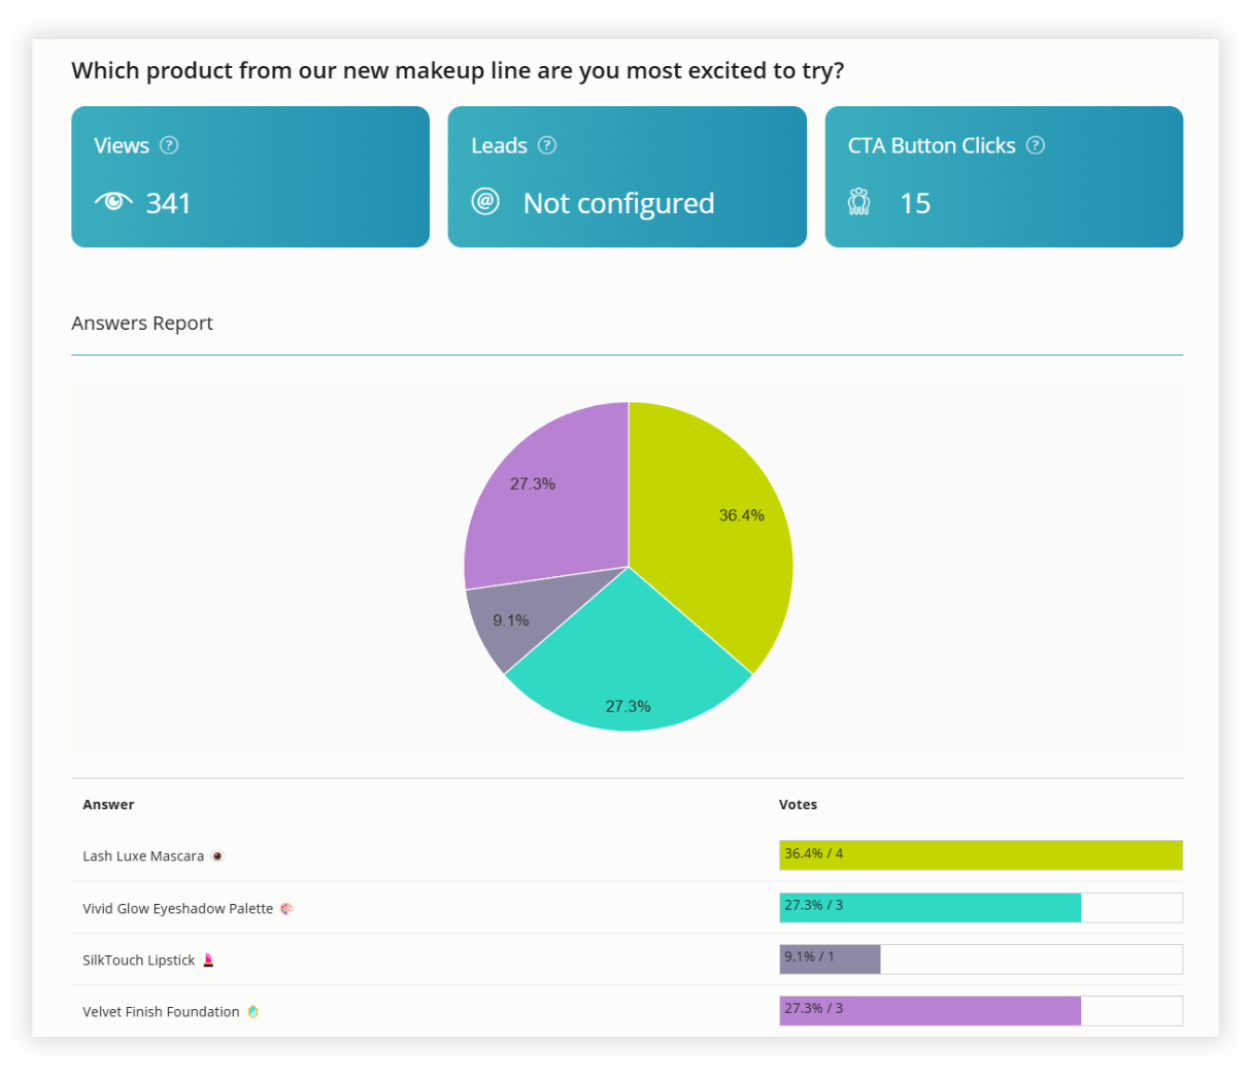
📊 Track Poll Results & Use the Insights
Once votes start coming in, check your poll’s analytics to see how it’s performing. Keep an eye on:
- Response trends: Are certain options getting way more votes?
- Engagement levels: Are people voting less than expected, or is participation slowing down?
- Timing: Do you get more responses at certain times of the day?
🎯 Try This: Use your poll results to refine your offerings and engage your audience. If one option stands out, dig deeper – ask your audience why they chose it or what variations they’d like to see. Another way to keep the conversation going is to share the results and get more input: “85% of you voted for Peach Ice Cream! Should we make it dairy-free too?”
Looking to add even more interactive elements to your Showit site? Check out our guides on creating a Showit quiz for personalized experiences and shareable content, or creating a Showit survey to collect valuable audience insights and feedback.
Ready to get started?
Make a Poll