How to Create a Mailchimp Quiz that Collects Leads
A Mailchimp quiz is a fun and effective way to collect leads. Instead of a traditional sign-up form, you can engage your audience with an interactive quiz built using Opinion Stage’s quiz maker that captures emails and connects them to Mailchimp for easy follow-ups.
1. Create a Mailchimp quiz
Start by creating a Mailchimp quiz. Make sure to write a catchy title and choose a strong cover image to make your quiz stand out. Keep your title short, engaging, and curiosity-driven. Words like “Find Out,” “Discover,” or “What’s Your…” work well.
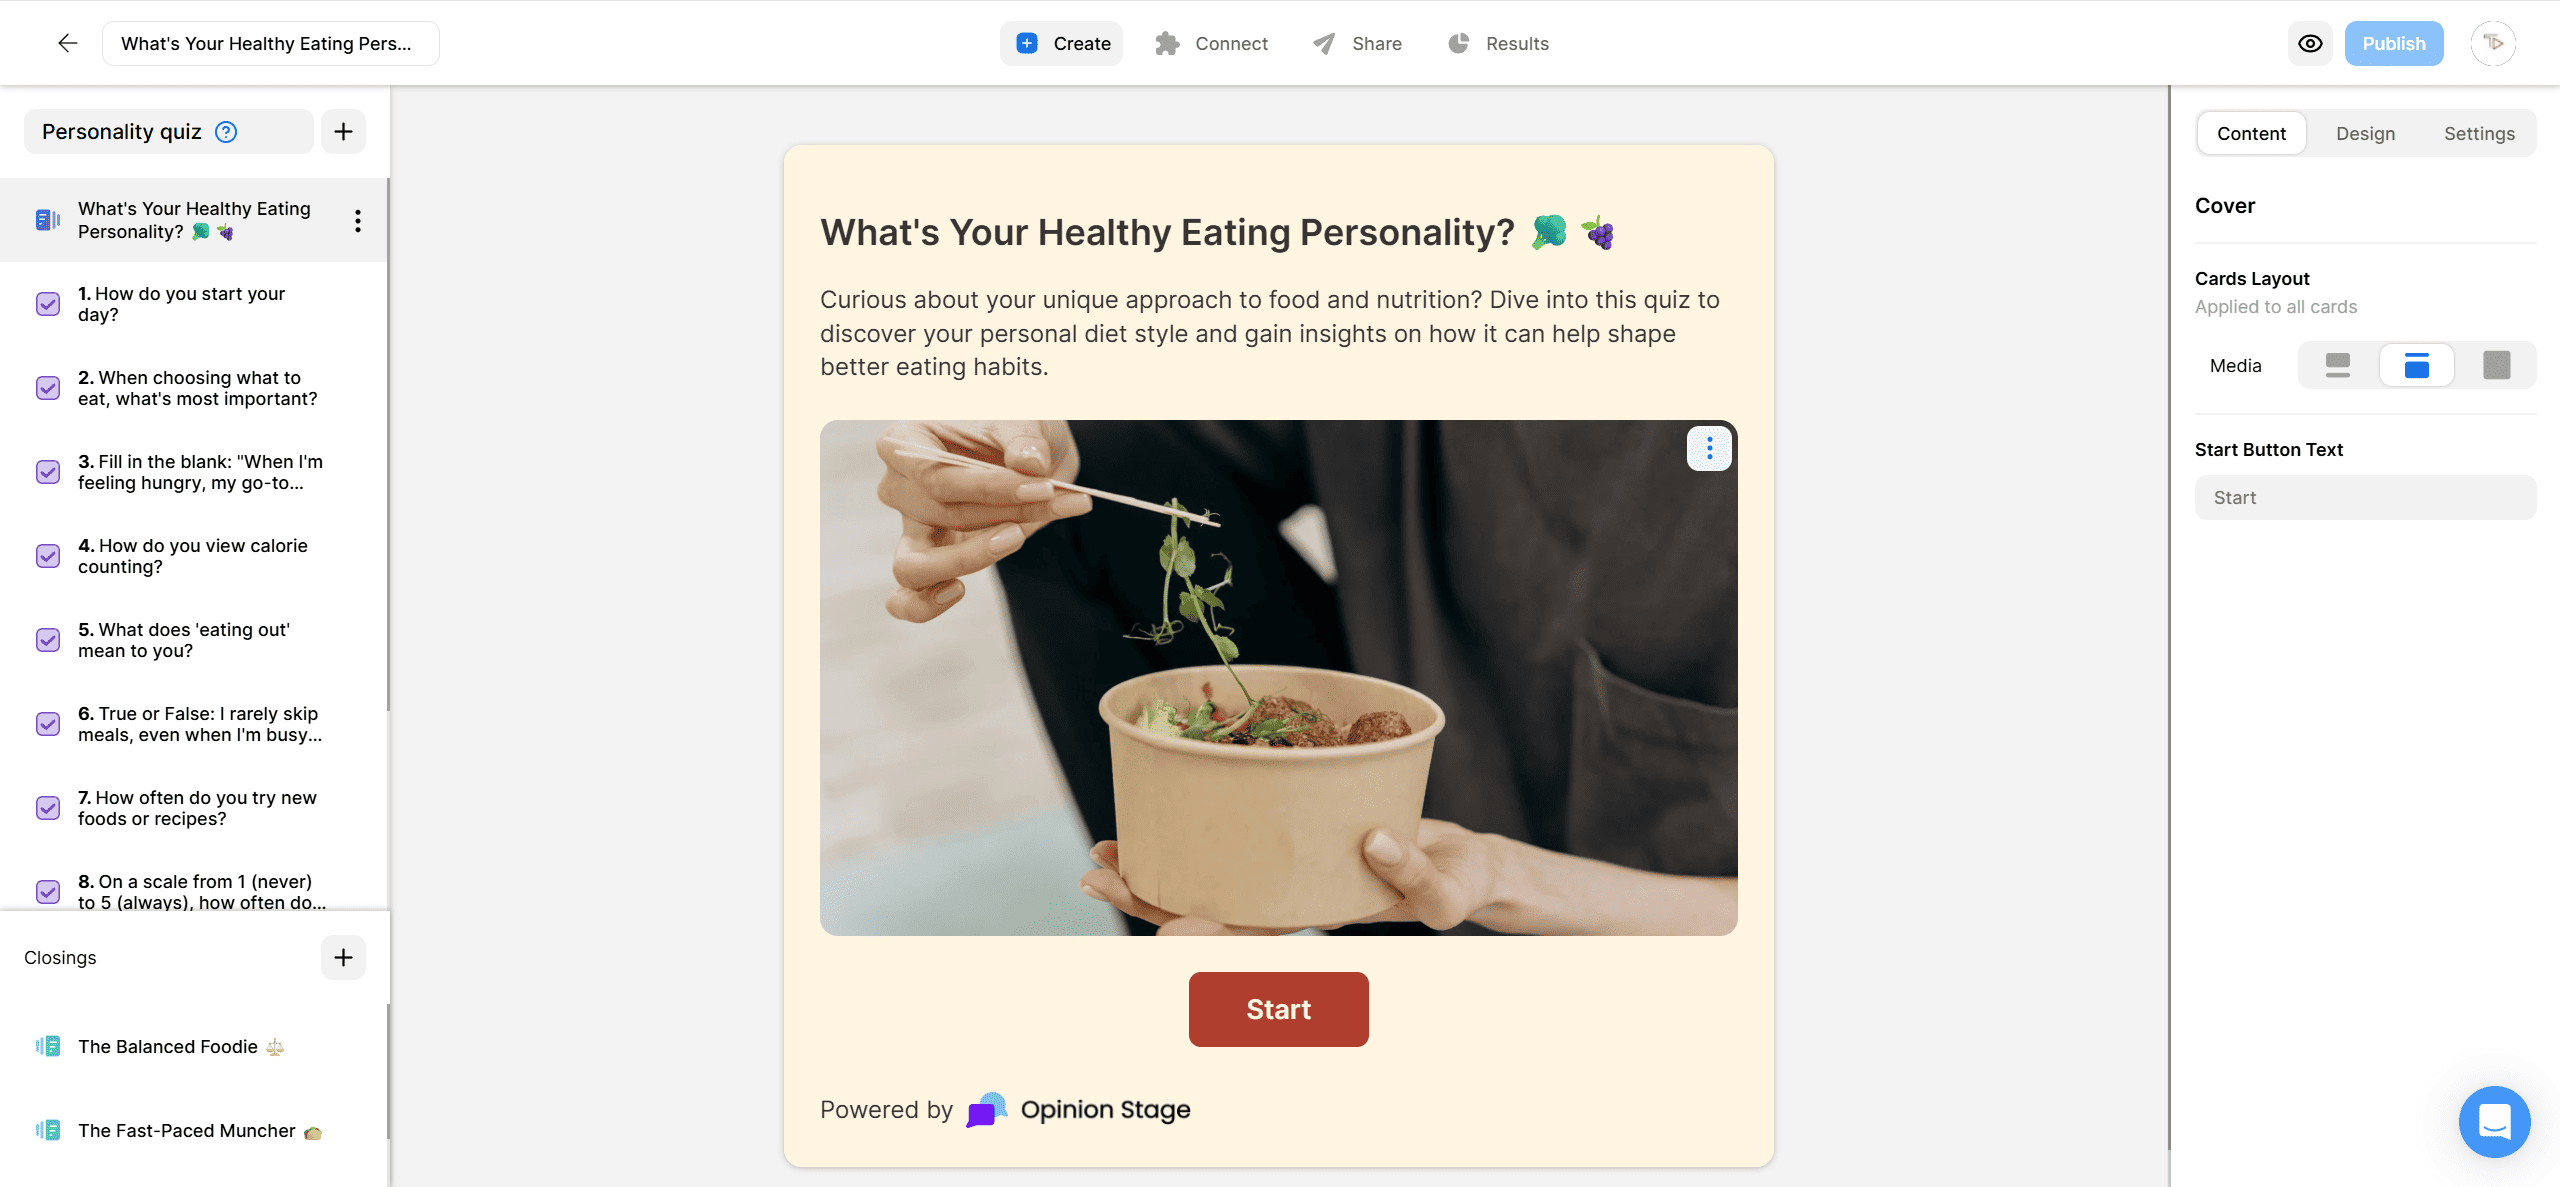
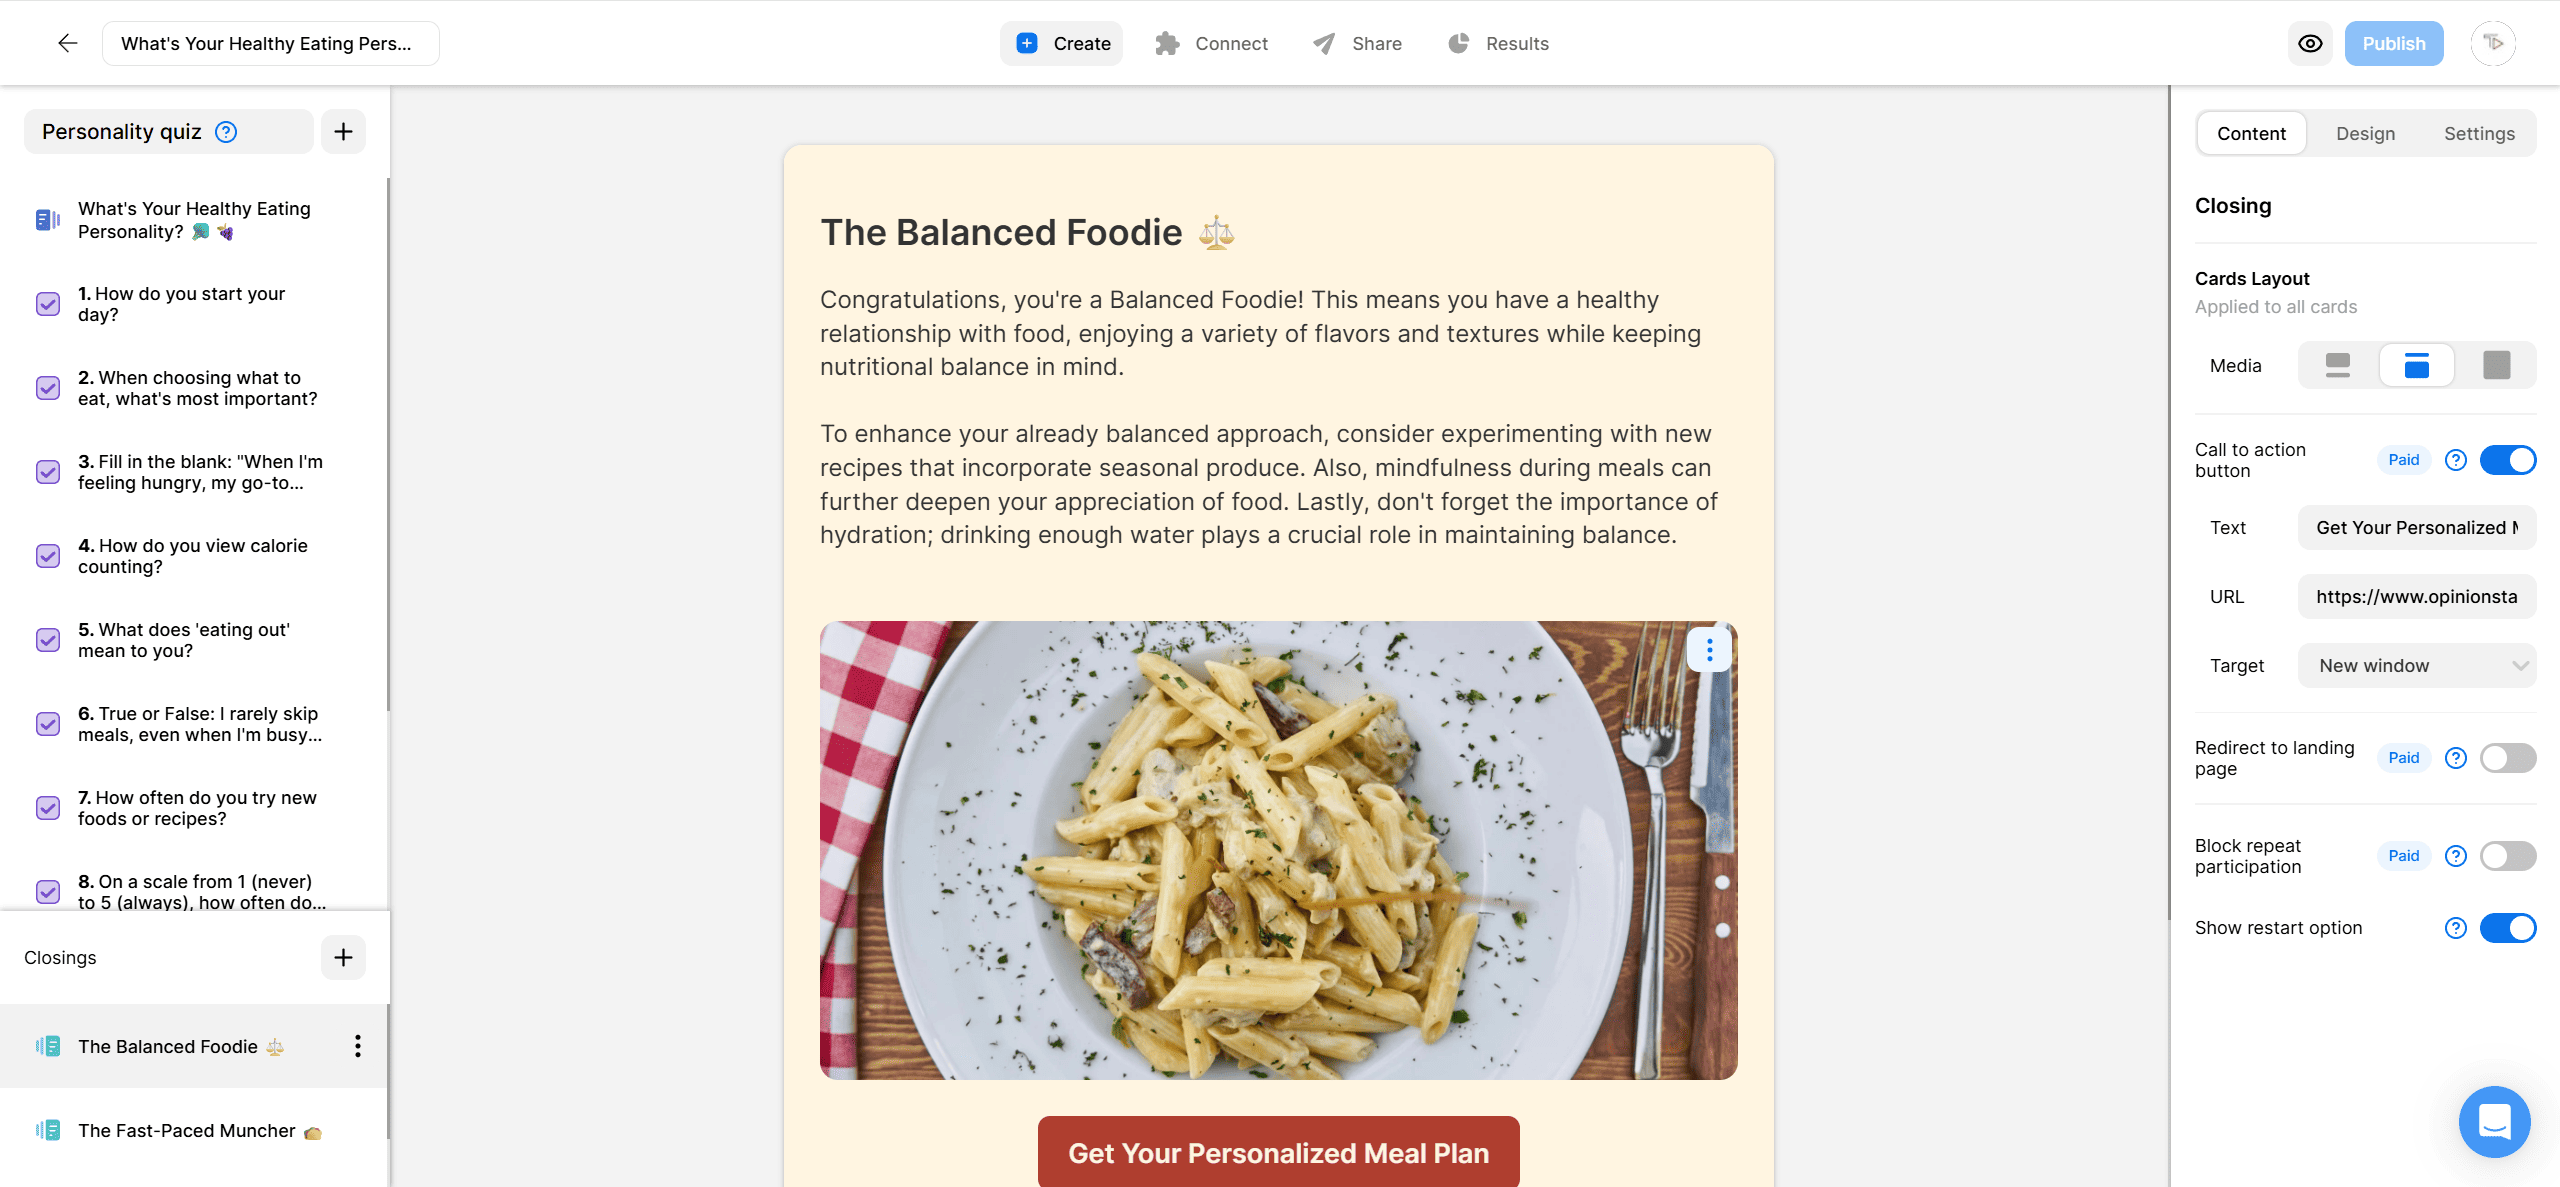
Now, define your quiz results based on the audience you want to attract. Whether it’s different personality types or product matches, make sure the results feel relevant and rewarding.
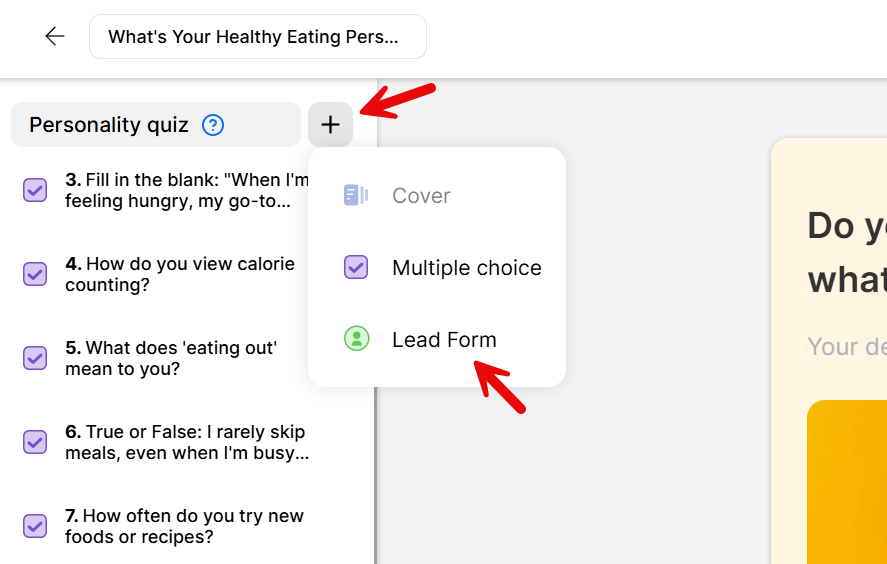
2. Add a lead form
Click on the + at the left-hand side of your screen and select the Lead Form.
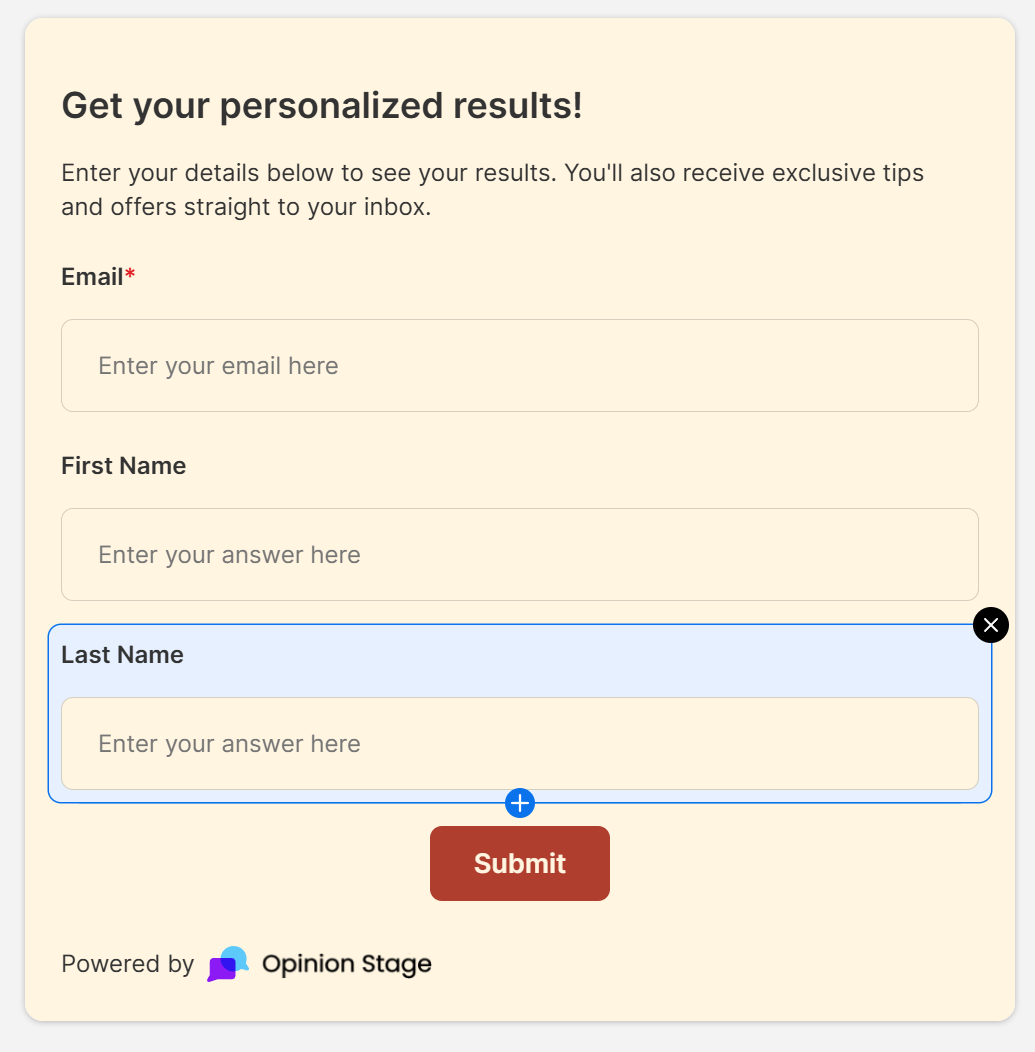
Fill out the lead form with all the details you want to send to Mailchimp, for example, email, first and last name, or website. Keep your lead form message simple and clear – use friendly language and let participants know how their info will be used. If you’re offering quiz results or a reward, mention that they’ll receive it right after submitting.
When finished, click the Publish button that’s located at the top-right of your screen.
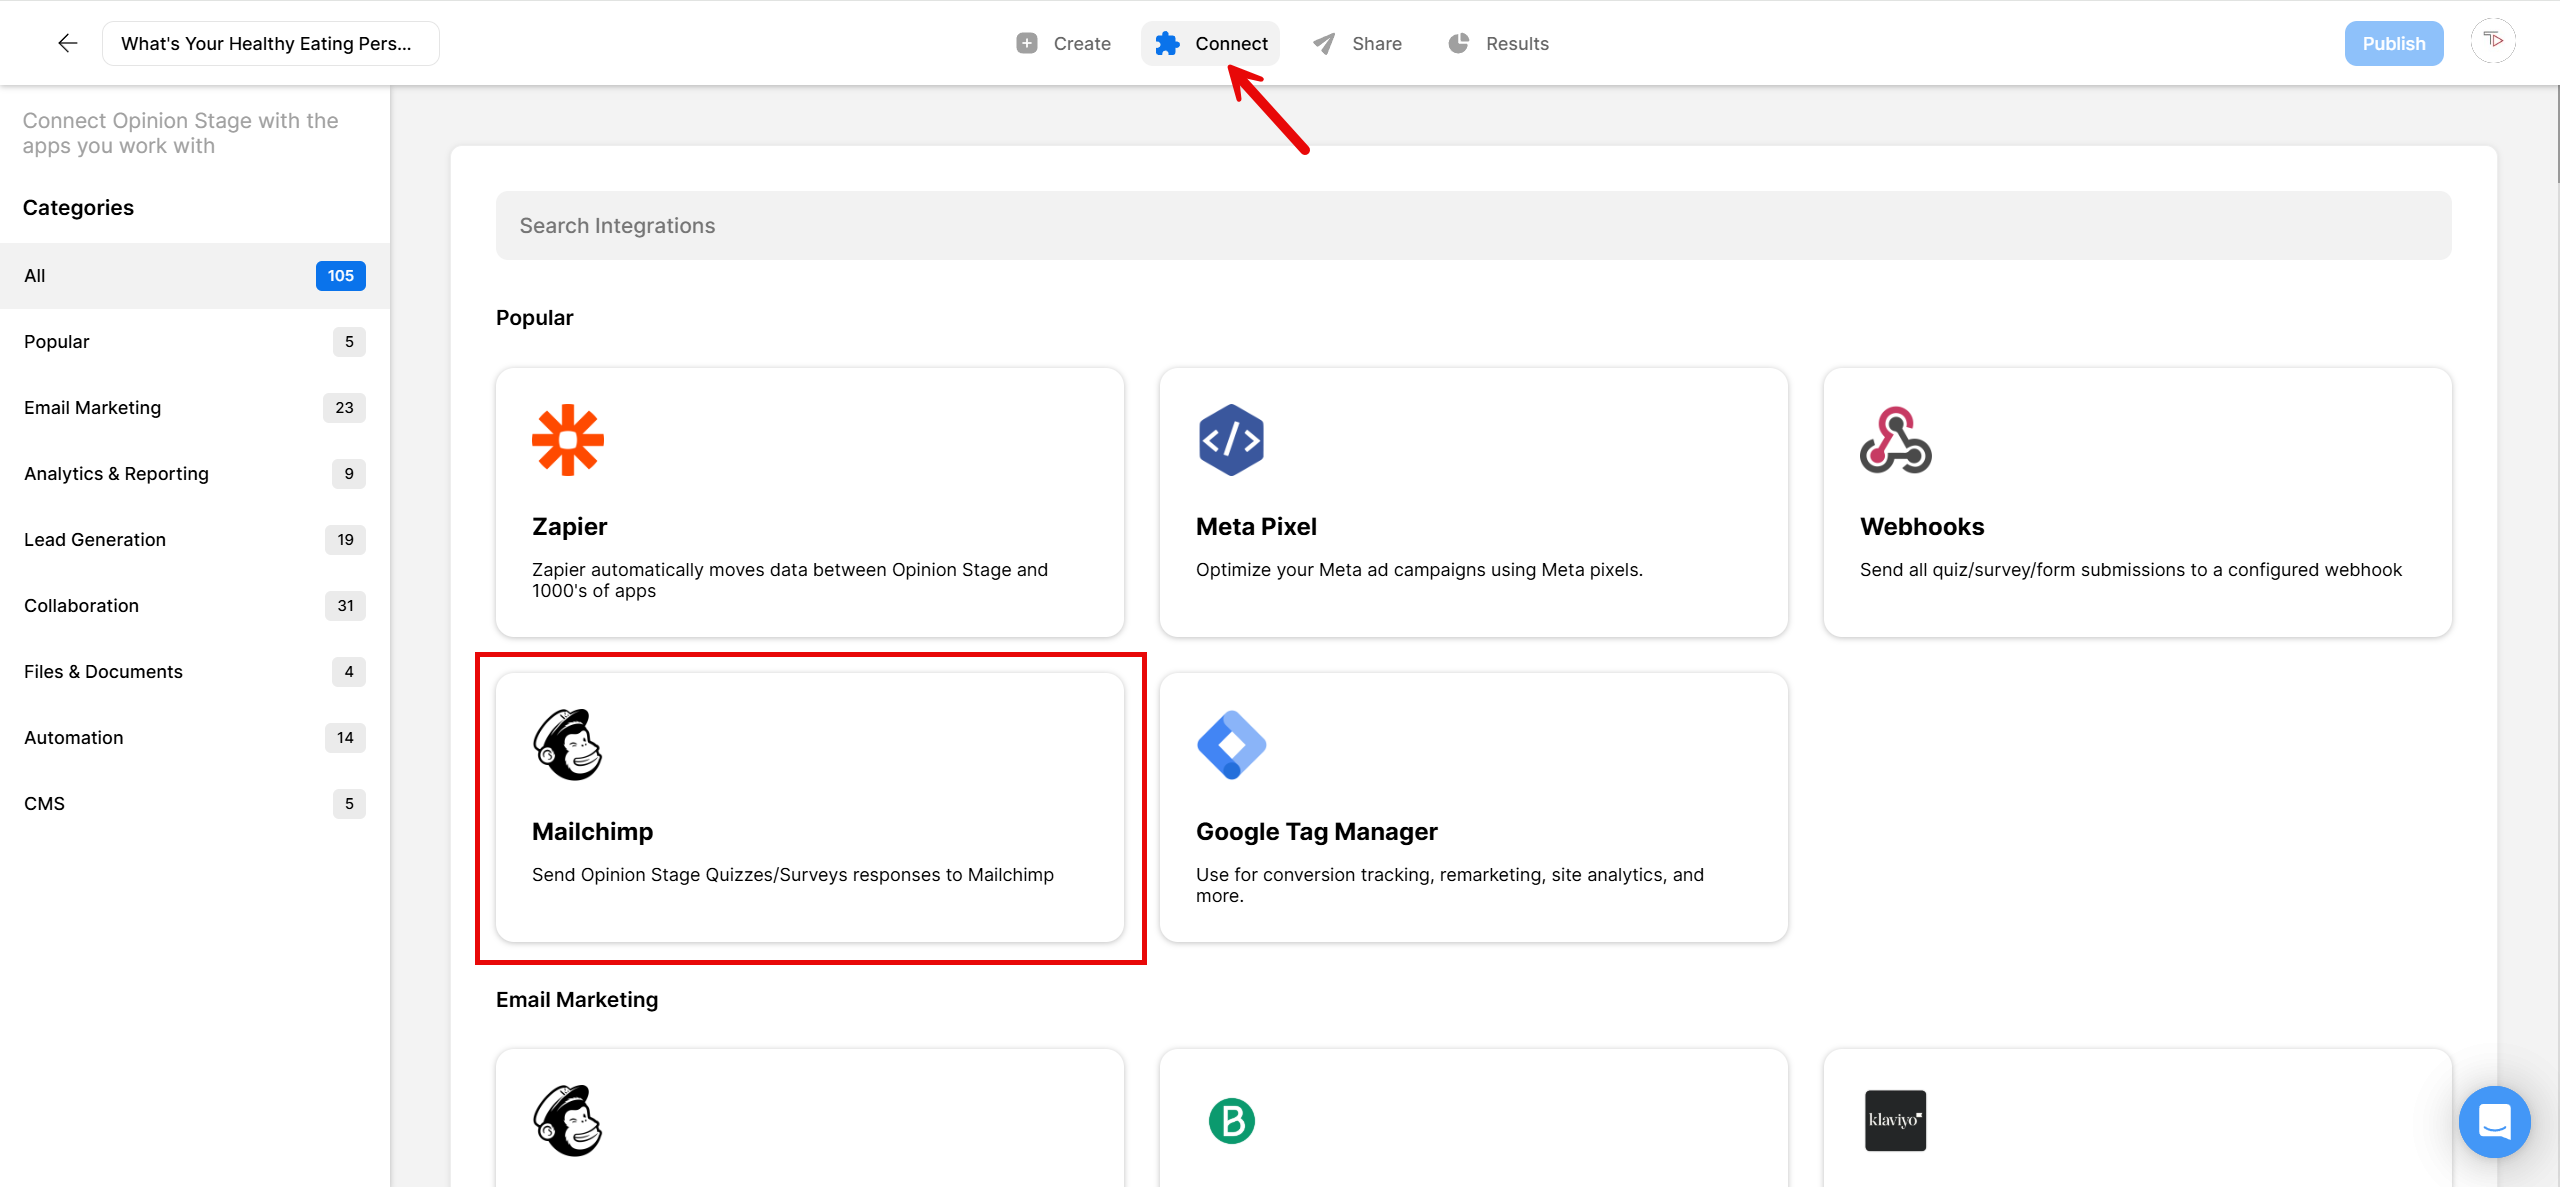
3. Connect to Mailchimp
Next, click on Connect, located at the top of your screen. Find the Mailchimp integration.
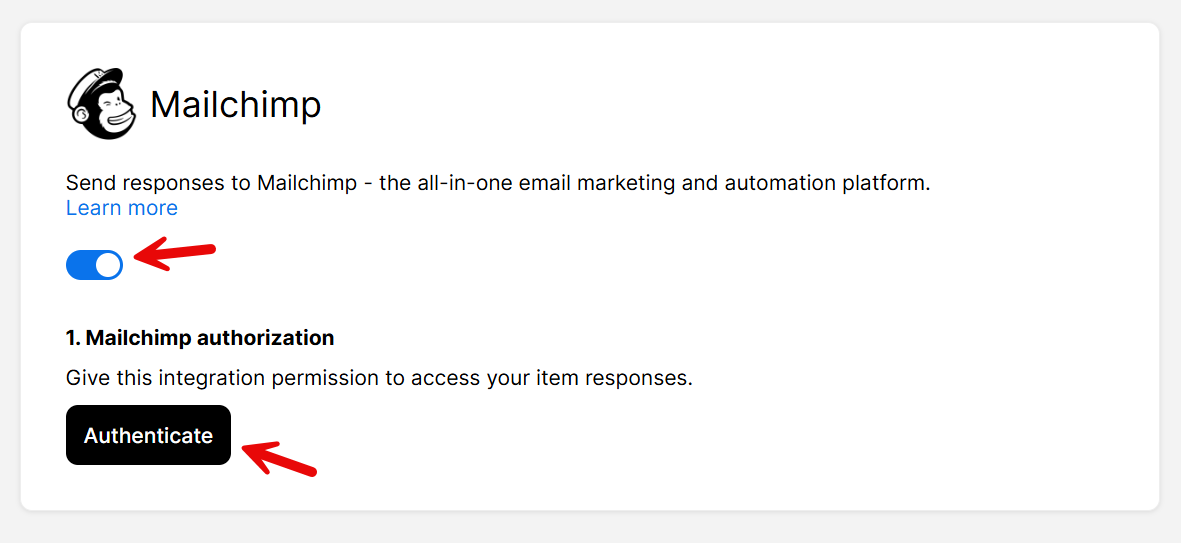
Toggle the switch on to activate the Mailchimp integration and click Authenticate. Follow the instructions to sign up and authenticate your Mailchimp account.
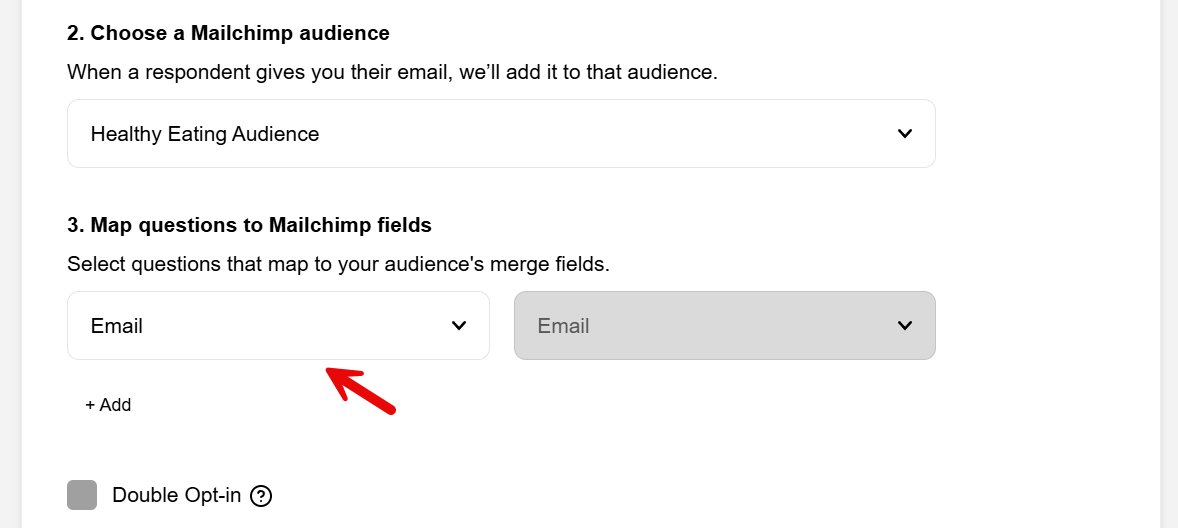
4. Select your Mailchimp audience
After you’ve connected your account, choose a Mailchimp audience and click Save.

5. Map & organize quiz data in Mailchimp
Now you can connect the emails and other information collected from your quiz to the matching fields in Mailchimp. This ensures that each lead’s details – like their name, email, and quiz responses – are stored correctly for easier segmentation and personalization.
To refine your audience even further, you can add tags to organize contacts. Apply a global tag to all leads or assign different tags based on quiz results, which is especially useful for quizzes with multiple outcomes. When you’re done, click Save.

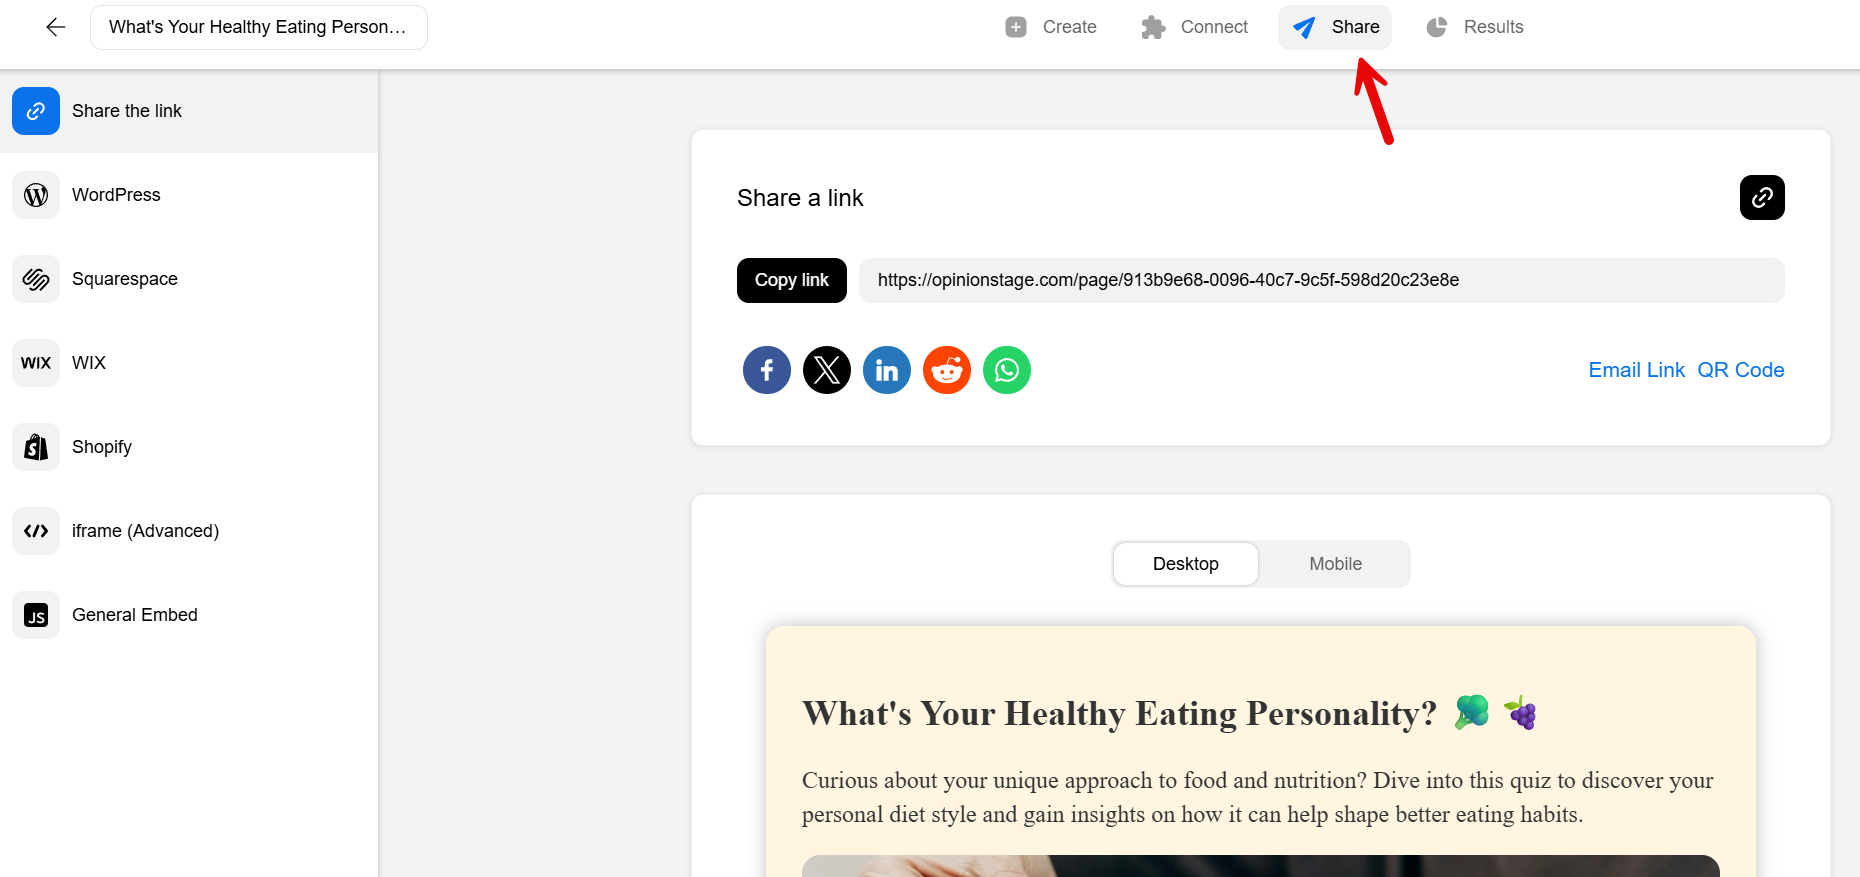
6. Share your quiz
Now that your quiz is ready, it’s time to share it with your audience. Click the Share button at the top of your screen to access the sharing options.
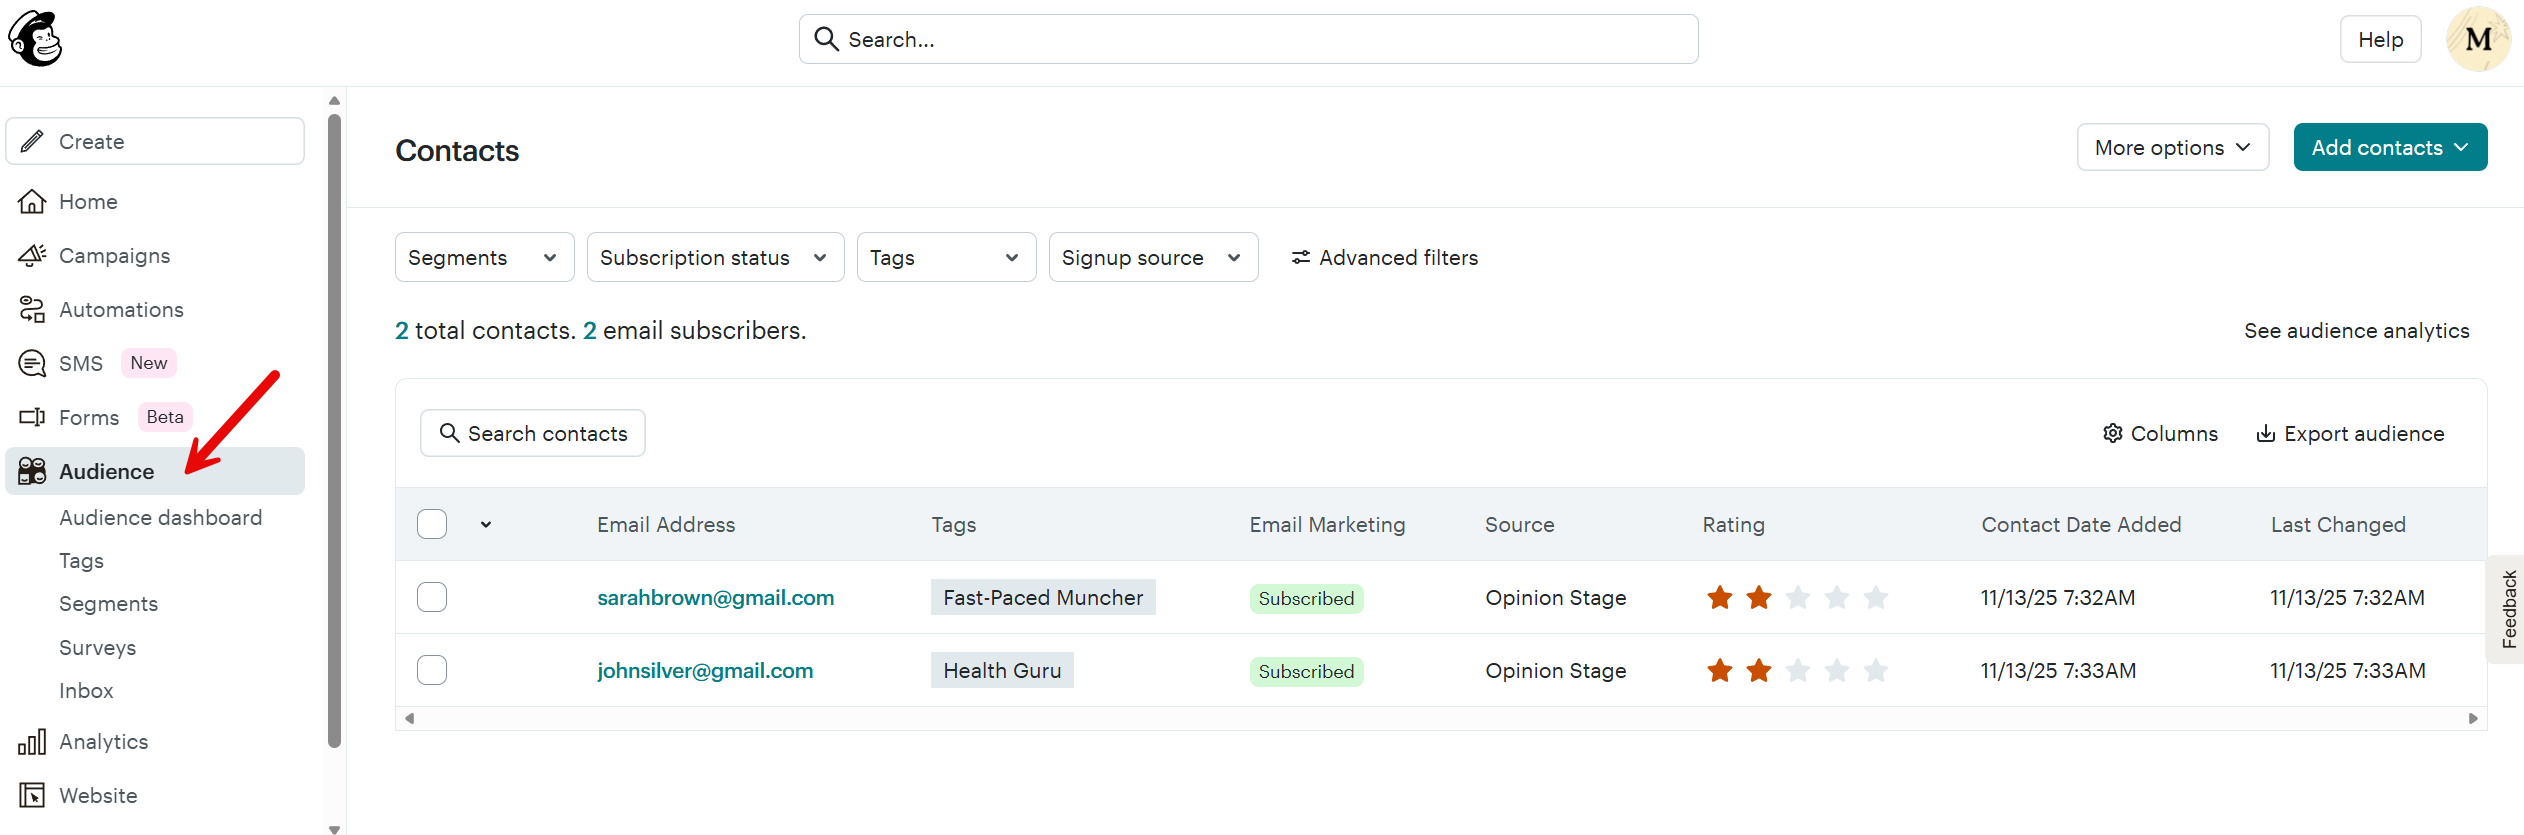
7. Find your quiz leads in Mailchimp
Once people start signing up through your quiz, their details will be automatically sent to Mailchimp. To access them, click on Audience in the side bar located on the left-hand side of your screen.
Here, you’ll see each lead along with the email, name, and any additional fields you mapped. If you added tags, you’ll also find them here, making it easy to segment and organize your audience for targeted follow-ups.
8. Follow up with leads through Mailchimp emails
Now that your quiz leads are in Mailchimp, it’s time to send them targeted emails. You can send a welcome email, follow up with a newsletter, or offer something exclusive, like a discount or bonus content. Set up an automated email sequence to nurture new leads, share personalized recommendations, or keep them informed about your brand.
💡Tip: Once your quiz is up and running, consider adding a Mailchimp survey or poll to gather additional input. Whether you’re looking for quick feedback or more detailed responses, surveys and polls help you stay engaged with your audience and make smarter, data-informed decisions.
And now you’re done!
For more information, refer to the Opinion Stage integration page on the Mailchimp site
FAQ
Can you create quizzes on Mailchimp?
No, you can’t create quizzes on Mailchimp. You will need to use quiz maker software, like Opinion Stage, to create a quiz and then paste the link into your Mailchimp content using a button block.
Can you embed a Mailchimp quiz inside an email?
While you can’t directly embed a quiz into your Mailchimp email, you can link to it. To start, create a quiz using quiz maker software, such as Opinion Stage. Then, copy and paste the quiz link into Mailchimp using a button block.
Ready to get started?
Make a Quiz